This setting is required
To get your Canvas Access Token, open your Canvas site. On the left sidebar, click on Account and then Settings.
Scroll down to Approved Integrations. At the bottom click the blue button that says +New Access Token.
In the Purpose field, fill in “Khan2Canvas” The Expires: field can be left blank unless you wish for you Access Token to expire after a certain date (the end of the semester, school year, etc.). Note that if you specify an expiration date, Khan2Canvas will not function until you generate and fill in a new Access Token. Click Generate Token when you are finished.
In the dialog box that appears, highlight the value in the Token: section. Make sure that you select the entire token. Leaving out characters at the beginning or end will result in Khan2Canvas not being able to communicate with Canvas. An example is shown below.
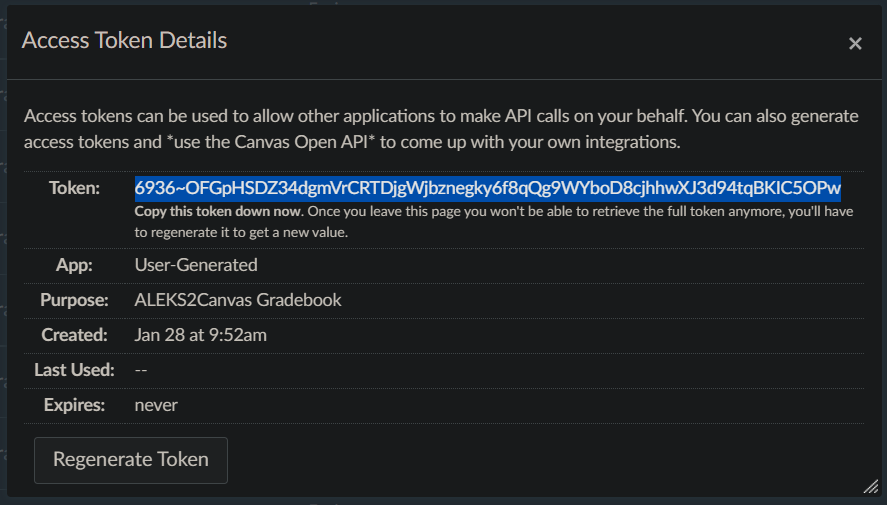
Copy the highlighted token by either pressing the key combination Ctrl+C (Command+C on Mac) or right click and select Copy.
When pasting directly into the Settings sheet you should always use the Paste Values Only option to preserve the formatting of the cells. To do so, click on the cell you want to insert data, right click, select Paste Special > Values Only. Alternatively you can use the keyboard combination Ctrl+Shift+V (Command+Shift+V on Mac).