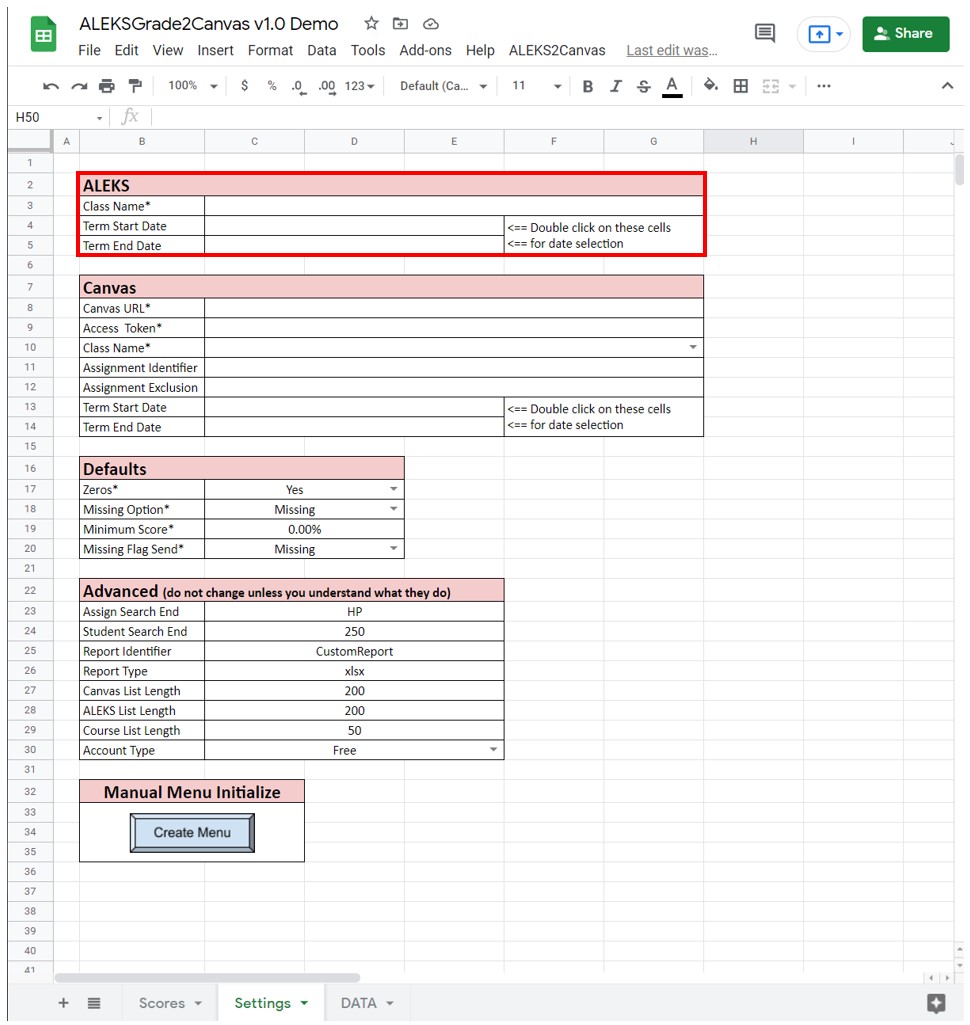
In the Settings tab of the spreadsheet, locate the section for ALEKS. Then, navigate to ALEKS and select the ALEKS class for which you will be using the spreadsheet.
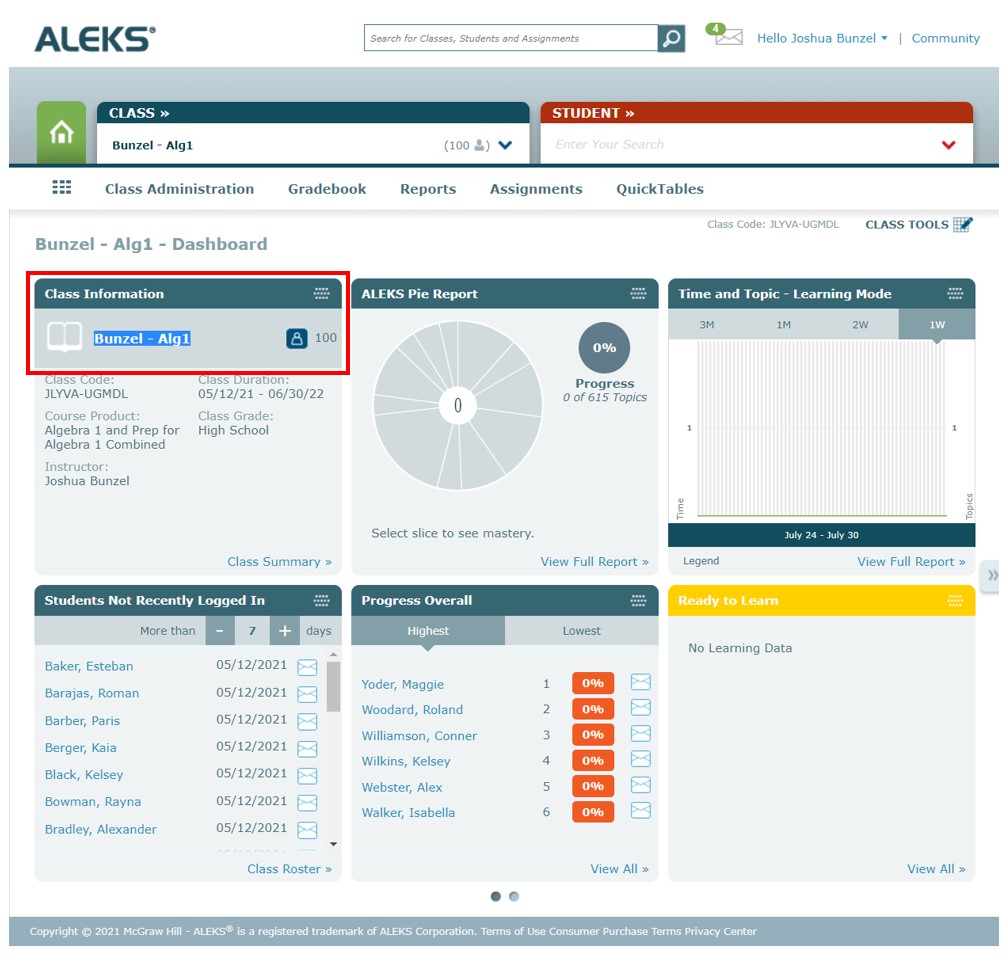
In the dashboard for your class, located the “Class Information” section. Highlight the class name and copy it. It is imperative that the class name in ALEKS and the class name you put into your spreadsheet are exactly the same. Omitting spaces or any characters will cause the spreadsheet to not load data from ALEKS.
Navigating back to the spreadsheet, paste the class name into the Class Name field for ALEKS. When pasting in values, use the Paste Values Only option. You can achieve this by using the keyboard shortcut Ctrl+Shift+V or right-clicking on the cell and selecting Paste Special->Paste values only.
The remaining ALEKS settings are optional, however, setting them will potentially decrease the number of assignments from ALEKS that you will need to scroll through and select for each assignment in the spreadsheet. Not filling in these settings can cause a large number of assignments to be loaded from ALEKS.
- The Term Start Date and Term End Date fields can be filled in to limit the scope of assignments the spreadsheet loads from ALEKS. You must specify BOTH a start and end date for this setting to work. The spreadsheet will only load assignments that have due dates within the dates specified here if desired. To set dates, double-click on the cells to show the date picker. If typing in dates, they must be in the format MM/DD/YYYY.
If you want to be updated when future versions are published, join the mailing list. You will only receive messages about new version releases and applications.
If you enjoy this application, consider leaving a review on Teachers Pay Teachers.